The US GENWEB Project is such a helpful website. It is a FREE site that provides links to a variety of the state's genealogy websites. It is organized by state and county. Each state looks somewhat different but is all within the outline of the US GENWEB project.
The sites are maintained by volunteers seeking to offer sites for FREE. This link opens you to the "About Us" portion of the site. Check it out to get a better feel of what is available. Be sure to check out the other tabs to get further information about the project.
When you are ready, click on your state. At the state home page, take a moment to check out what is available on this site for your state. Different states may offer different things so do not assume one page is the same as another.
Then find where the list for the counties is located and click on the county you are researching. Check out what kinds of information are available for your county. These sites can offer you some wonderful information - actual cemetery listings, marriage information, birth, death, obituaries, and much more.
Remember, these sites are prepared and maintained by volunteers. You will find that some areas may say things like "up for adoption" - this means you can actually help if you are so inclined. If not, you will have to wait until someone steps up and decides to volunteer their time to help.
I strongly suggest that you check out this site when working in the United States. You will be so excited when you start finding your family. Let me know how you are doing!
US GENWEB PROJECT
Sunday, September 26, 2010
Thursday, September 23, 2010
Got a Basic Computer Question? Here are the Answers!
I found this wonderful website to answer lots of those questions about the things you need to know when using your computer. It is actually written in an easy format. I was impressed - I think you will be too! There is something for everyone. They teach you things as easy as cleaning the ball on your mouse to how to install a sound card and ALL the things you need to know in between. This Basic Computer Skills site is one you HAVE to check out. There are pictures and simple explanations on everything. It is going to be one of my favorite spots that's for sure.
Wednesday, September 22, 2010
15 Minute Family History
Some members of the Family Search team have come up with this great grouping of places to help with getting you going on your family research. You can download this as a PDF file or just click on the links and get started. We will be discussing most of these links in future postings but here it is in one location for easy access. It is called 15 Minute Family History. You may get hooked and spend more than 15 minutes but it is a quick start way to begin researching. Have Fun!
Tuesday, September 21, 2010
Beginning German Research
While preparing for the Internet class tomorrow, I ran across this blog by the Church which posted this article on doing Beginning Research in Germany. I have not used it because I am not doing German research at this time but I thought those of you who are beginning might find some help. Check it out and let me know.
Here is a link to the Blog http://blog.beta.familysearch.org/
Here is a link to the Blog http://blog.beta.familysearch.org/
Thursday, September 16, 2010
EXPLANATIONS - BASIC COMPUTER
One of the most important things to understand is knowing how to do some basic computer functions. As I teach classes, these few commands seem to be the ones most misunderstood. I hope these simple explanations will help you better understand how to execute these functions.
These functions can be used in almost any program. Remember that Right Mouse is Your Friend. If you learn these simple commands, they will assist you in a variety of ways. You can drag and drop a variety of things like pictures, sayings, files, etc. to new locations such as from one program to another, from one file to another, from one drive to another, etc. You can do the same thing with copy and paste.
Practice using these functions on unimportant items until you understand how easy it is to do them. By the way, there are always a variety of ways to do almost every command and this is only one way. If you have learned another way and if it easier for you, then continue using that method. Only change if it will make it easier for you.
NOTE: A caution, if you are moving files or important documents, you may want to do Copy/Paste instead of Drag and Drop. You can always go back and delete the original file after you make sure the file is safe in its new location.
Highlight – To highlight an item (word, saying, file, picture, etc.) put the cursor at the beginning of the item and with your finger depressed on the left side of the mouse, move the cursor over the desired item until there is a colored film over the entire item – this is highlighting. From here you will do something else with the item such as copy/paste, delete, drag/drop, etc. You can remove your finger from the mouse and the item will remain highlighted.
Copy/Paste - Highlight an item – using your mouse, depress the right side to display a variety of functions. Select the Copy function. Your computer will now copy the highlighted item into it's memory. Now go to a new location and with the left side of your mouse, depress the mouse to put the cursor into the new location. Depress the right side of the mouse to show the functions, select Paste. This will put your item into the new location. (Note: The item will still remain in the original place as you only copied the item but it will now also be in the new location.) Another command for Copy is using Control C and another command for Paste is using Control V. Some items may not copy and paste in any other way so try this method for those difficult items.
Cut/Paste – Do the same as with Copy and Paste only select Cut as the first function. Note: When you cut an item, it will delete the item from the original location. Do this only if you know you no longer wish for it to be in the new location. If you do not immediately move it to a new location, it may delete forever. If you Paste it to a new location, you will now have it only in that new location.
Drag and Drop – Highlight an item. Depress the left side of the mouse to Grab the highlighted item. Now Drag it over to a new location and let go of the left side of the mouse or Drop it into this new location.
Delete – To easily delete an item, first highlight the item then depress the right side of the mouse to reveal the functions. Select Delete or Cut if delete is not available. This will remove the item. You can also highlight the item then select the delete button on your key board. This will accomplish the same thing.
Rename – This is mostly used for renaming documents, pictures, folders, etc. Highlight the item (the original name). Depress the right side of the mouse to reveal functions. Select Rename. The item will then show with the cursor in the original name box and most often the original name will be highlighted. Type in the new name. You will note that the original name that was highlighted will disappear. If you have clicked into the box and caused the highlighting to disappear, you can use your delete or backspace buttons to erase the original name or you can highlight and delete the original name. Bottom line, you need to remove the original name and add the new name.
You can modify the original name by clicking into the original name, put the cursor where you want to modify and begin to type. For instance, you may want to change the original name of a picture to explain more of the picture. If the original name was "Mary", you may want to add what she was doing so you can modify the title of the picture by clicking into the name (follow directions for renaming) then put the cursor where you want to change - in this case it would go behind Mary. Type in the correction, "Mary at the beach 2010". This will now be the new name.
With these simple tools, you will be able to save lots of time. If you are making a flier and need multiple copies of the same thing (on one page), just use the copy/paste to fill up your page. If you want to move files from your hard drive to a flash drive, you can use copy/paste or drag and drop and move entire files in one shot. You can move pictures around in a presentation with the drag and drop. You can delete all of those unnecessary files with the delete function. You can organize all of your files with renaming and a combination of all of these commands. Once you learn these simple commands, you will not even realize how often you use them...it will become second nature.
One comment from me...I teach a lot of people that are afraid of the computer. I do understand their fear but it is like anything else. You just need to take a few minutes to learn the basics. Do not try to understand the entire computer - I don't understand the entire computer. Just take your time and learn one thing at a time and use it! Eventually you will master that one thing and then you can move on.
Please let me know if there is something that you do not understand and would like to know more about. If you have these questions, then others do also. Let's help each other by letting me (and others) help you. There is no question too insignificant. We all have to start somewhere. Some of us know more about some things than others. I am always going to my son-in-law or daughter-in-law to ask for help. I am here to help YOU so please ask. You can comment to this posting or send me an email. Don't just sit there wondering how to do something...ASK! Please Ask. That's why I set up this blog - to help YOU!
Wednesday, September 15, 2010
Removing LDS Information from Roots Magic Reports
If you are printing a report (like a family group sheet or a pedigree chart etc.) and do not want the LDS ordinances to show, follow these simple steps to prepare your reports for printing.
Directions supplied by Roots Magic Forum
There are a couple of options for hiding LDS information.
** Do Tools > File Options and then unmark the LDS Support checkbox (note: make sure ALL of the
LDS boxes are unchecked). This will turn off displays like the temple and BEPS in the status area. (This may do the trick but if you need more do the next step)
- Do Lists > Fact Type list, then select and edit the 6 LDS ordinance fact types (LDS Baptism, LDS Endowment, etc). You can turn off where each of these fact types will print (group sheets, narratives, individual summary, and lists).
Another option: IF you only want to remove the LDS detail, to generate a report, you can GEDCOM to a new database without the LDS info, run the report, and then delete the new database.
Note: When you have competed printing the reports without the LDS information, go back into Tools, File Options and click in all 4 LDS boxes to restore the view of the LDS information.
Friday, September 10, 2010
Right Mouse is Your Friend (Copy/Paste and Drag/Drop)
When I teach basic genealogy classes, it always comes about that patrons do not know and understand how to do many functions on their computer that would be helpful in their genealogical work. I always end up with a basic computer class to help teach some of these skills.
Some of the most important functions to use when doing genealogy are:
1. Copy and Paste
2. Cut and Paste
3. Delete
4. Insert
5. Save as (especially for pictures)
6, Rename
And many more.
My favorite expression is "RIGHT MOUSE IS YOUR FRIEND". When you look at your mouse, you generally see three parts - the left side (which is the side used to do almost everything), the center wheel (which will allow you to scroll up and down your document), and the right side (which gives short cut functions).
When you are in a program, you generally have a variety of ways to access or perform functions. Most often you can go up to the Menu Bar and find ways to alter your document. There are generally icons somewhere on the program that will also allow you to do the same thing. The easiest way would often be to just use your mouse to assist you. Remembering that the RIGHT MOUSE IS YOUR FRIEND, click on the right side of your mouse to see what commands are available.
Many times you will need to HIGHLIGHT words, folders, or whatever you wish to work on before you click on the right side of the mouse.
So if I wanted to copy and paste something, I would first highlight the item by placing the cursor over the beginning of where I wish to highlight then keeping the left side of the mouse depressed, I then would slide the cursor over the item to be highlighted.
Once it is highlighted, I then release the left side of the mouse (highlighting will remain) and depress the RIGHT side of the mouse. The functions to COPY, CUT, DELETE, etc. will appear. I will then select to COPY the item.
I then move the cursor to where I would like the item to appear (which will be a new location or can even be in another program) and depress the left side of the mouse to insert the cursor to that location (note: You can move around using the left side of your mouse and not worry about losing the copied item because the item is held in the memory until the new function of paste or delete or whatever is selected).
I then click on the RIGHT side of the mouse again and select PASTE. The copied item will then be inserted into the new location. (note: By copying, the original item is still in the original location as well as now in the new location. If I used CUT, the item would no longer be in the original location.)
I would use this same idea, "RIGHT MOUSE IS MY FRIEND", to do a variety of functions. If you are in a program and can not remember how to do something or where to find a specific function key, remember the phrase RIGHT MOUSE IS YOUR FRIEND. Click on the right side of the mouse and see if what you are looking for is there...more ofen than not, it will be.
Monday, September 6, 2010
How to Open a Flash Drive or Another Drive
One of the problems I see with newbies to genealogy is that they have problems with computer skills. Hopefully I will help you to feel a little more comfortable in trying to do some of these tasks that are necessary for genealogical research.
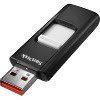
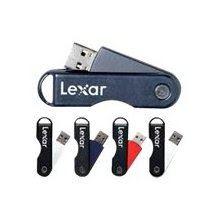 A must have when doing genealogy is to have a Flash Drive (Thumb, Jump or whatever you want to call it Drive - portable drive). These are small yet hold vast amounts of information. They are so easy to store - just slip it in your pocket, purse, backpack, wallet, key chain, etc. If you get in the habit of working off of a flash drive, you can always have your files right at hand whether you carry around a computer or not....this is your computer in a way. This little flash drive can hook up to any computer and allow you to access YOUR information.
 - Insert flash drive (thumb drive) into the USB port on your computer. Most newer computers have these ports in easy to locate positions...in front or on the sides of lap tops. Look around. It is the little rectangle port that will fit the smaller protruding part of the flash drive. If you have an older computer, you may need to look in the back. You might also need to buy a multiple port which will expand your one port into several allowing you to use several devices using USB ports at the same time.

* NOTE: Always close down your flash drive before you disconnect it from the computer. To do this, look at the bottom right corner of your computer. Find the little icon for your flash drive. Click on the icon to open it up. It will ask if you want to close, say yes (sometimes all you have to do is click on the link to shut down the flash drive). Once you have shut down the flash drive, you may remove the flash drive from the USB port. Failure to shut down the flash drive before removing may result in the loss of information or destruction of your flash drive.
 A must have when doing genealogy is to have a Flash Drive (Thumb, Jump or whatever you want to call it Drive - portable drive). These are small yet hold vast amounts of information. They are so easy to store - just slip it in your pocket, purse, backpack, wallet, key chain, etc. If you get in the habit of working off of a flash drive, you can always have your files right at hand whether you carry around a computer or not....this is your computer in a way. This little flash drive can hook up to any computer and allow you to access YOUR information.
 There are a wide variety of styles and sizes (meaning how much information they will hold). You will probably want one that is 1-4 gigabytes - that will hold tons of information, pictures, and documents. They are quite reasonable in price also. (These flash drives can be purchased at almost any discount or electronics store or on the Internet.)
 - Insert flash drive (thumb drive) into the USB port on your computer. Most newer computers have these ports in easy to locate positions...in front or on the sides of lap tops. Look around. It is the little rectangle port that will fit the smaller protruding part of the flash drive. If you have an older computer, you may need to look in the back. You might also need to buy a multiple port which will expand your one port into several allowing you to use several devices using USB ports at the same time.
- Go to START (or desk top) – then My Computer and double click on the desired drive -
 A window will open showing the different plug in divices on your computer (see right side of picture). This is where you will need to know if you want in your C drive, your disk drive (A, B, D, or other), or into your flash drive (which will be allocated by a letter drive - like E).
Double click on the drive you want to open.

Double click on the drive you want to open.
You will now be able to access your flash drive.
Now you really need to understand FILES on your computer to help you maneuver around to find what you are looking for. Check out "HOW TO ORGANIZE FILES" to help you better understand what to do when you do get to the drive you want.
Now you really need to understand FILES on your computer to help you maneuver around to find what you are looking for. Check out "HOW TO ORGANIZE FILES" to help you better understand what to do when you do get to the drive you want.
* NOTE: Always close down your flash drive before you disconnect it from the computer. To do this, look at the bottom right corner of your computer. Find the little icon for your flash drive. Click on the icon to open it up. It will ask if you want to close, say yes (sometimes all you have to do is click on the link to shut down the flash drive). Once you have shut down the flash drive, you may remove the flash drive from the USB port. Failure to shut down the flash drive before removing may result in the loss of information or destruction of your flash drive.
Note: You should always make back ups of your information. Do not trust that one flash drive will be enough. It can be easily destroyed just as a cd/dvd or even the crashing of your hard drive.
Saturday, September 4, 2010
WELCOME!
Hopefully you will be able to find some answers to your questions as you begin your journey into your family history. I hope to be able to help you.
I know that tons of questions arise when starting anything so I am sure that you may find that you need further explanations or help. Please feel free to email me or make comments to any of the topics covered.
Some topics we will cover are:
1. Getting started doing your family history
2. Basic Computer skills
3. Basic research
4. Using a computer program to organize your information
I know there will be many other topics along the way but this should get us started.
If you have any questions, please feel free to comment
Subscribe to:
Posts (Atom)